CarPlay with React Native
Welcome to CarPlay Development!
Begin your journey with the App Programming Guidelines for CarPlay (opens in a new tab), a comprehensive 50-page manual by Apple detailing the essentials for CarPlay apps.
For additional details while developing or contributing, refer to the CarPlay Documentation (opens in a new tab).
🚀 Quickstart: Utilize the simulator to test CarPlay capabilities without waiting for Apple's entitlement approval.
🔑 Entitlements: To deploy on a device or distribute via App Store Connect or TestFlight, obtain a CarPlay entitlement here (opens in a new tab). The approval duration varies, and participation in the MFi program may expedite the process. Incorporate the entitlement into your app's provisioning profile in Xcode.
🖥 Simulator: In Xcode, navigate to the Simulator window, choose IO > External Displays > CarPlay to launch the CarPlay simulator.
Important:
Ensure your Entitlements.plist within the iOS/ directory contains the correct entitlement key, whether for simulation or actual deployment.
Installing
You need to convert your project to using Scenes (opens in a new tab), as this is the standard when managing multiple windows in iOS 13+. This is a requirement for CarPlay apps.
1. Add your PhoneScene
This is where your app will run on the phone.
PhoneSceneDelegate.h
#import <UIKit/UIKit.h>

@interface PhoneSceneDelegate : UIResponder <UIWindowSceneDelegate>

@property (strong, nonatomic) UIWindow *window;

@end
PhoneSceneDelegate.m
#import "PhoneSceneDelegate.h"

@implementation PhoneSceneDelegate
- (void)scene:(UIScene *)scene willConnectToSession:(UISceneSession *)session options:(UISceneConnectionOptions *)connectionOptions {
  AppDelegate *appDelegate = (AppDelegate *)UIApplication.sharedApplication.delegate;
  UIWindowScene *windowScene = (UIWindowScene *)scene;
  UIViewController *rootViewController = [[UIViewController alloc] init];
  rootViewController.view = appDelegate.rootView;
  UIWindow *window = [[UIWindow alloc] initWithWindowScene:windowScene];
  window.rootViewController = rootViewController;
  self.window = window;
  [window makeKeyAndVisible];
}

@end
2. Add your CarScene
This is where your app will run on CarPlay.
CarSceneDelegate.h
#import <Foundation/Foundation.h>
#import <CarPlay/CarPlay.h>

@interface CarSceneDelegate : UIResponder <CPTemplateApplicationSceneDelegate>
@end
CarSceneDelegate.m
#import "CarSceneDelegate.h"
#import "CarSceneDelegate.h"
#import "RNCarPlay.h"

@implementation CarSceneDelegate

- (void)templateApplicationScene:(CPTemplateApplicationScene *)templateApplicationScene
      didConnectInterfaceController:(CPInterfaceController *)interfaceController {
    // Dispatch connect to RNCarPlay
    [RNCarPlay connectWithInterfaceController:interfaceController window:templateApplicationScene.carWindow];
}

- (void)templateApplicationScene:(CPTemplateApplicationScene *)templateApplicationScene
      didDisconnectInterfaceController:(CPInterfaceController *)interfaceController {
    // Dispatch disconnect to RNCarPlay
 in   [RNCarPlay disconnect];
}

@end
3. Add Scene Manifest to Info.plist
ios/App/Info.plist
<key>UIApplicationSceneManifest</key>
<dict>
  <key>UIApplicationSupportsMultipleScenes</key>
  <true/>
  <key>UISceneConfigurations</key>
  <dict>
    <key>CPTemplateApplicationSceneSessionRoleApplication</key>
    <array>
      <dict>
        <key>UISceneClassName</key>
        <string>CPTemplateApplicationScene</string>
        <key>UISceneConfigurationName</key>
        <string>CarPlay</string>
        <key>UISceneDelegateClassName</key>
        <string>$(PRODUCT_MODULE_NAME).CarSceneDelegate</string>
      </dict>
    </array>
    <key>UIWindowSceneSessionRoleApplication</key>
    <array>
      <dict>
        <key>UISceneClassName</key>
        <string>UIWindowScene</string>
        <key>UISceneConfigurationName</key>
        <string>Phone</string>
        <key>UISceneDelegateClassName</key>
        <string>$(PRODUCT_MODULE_NAME).PhoneSceneDelegate</string>
      </dict>
    </array>
  </dict>
</dict>
Entitlement matrix
| List | Grid | T B | Alert | A S | 🎤 | ▶️ | Map | 🔎 | POI | Info | 📇 | |
|---|---|---|---|---|---|---|---|---|---|---|---|---|
| com.apple.developer.carplay-audio | ✅ | ✅ | ✅ | ✅ | ❌ | ✅ | ✅ | ❌ | ❌ | ❌ | ❌ | ❌ |
| com.apple.developer.carplay-communication | ✅ | ✅ | ✅ | ✅ | ✅ | ✅ | ❌ | ❌ | ❌ | ❌ | ✅ | ✅ |
| com.apple.developer.carplay-charging | ✅ | ✅ | ✅ | ✅ | ✅ | ❌ | ❌ | ❌ | ❌ | ✅ | ✅ | ✅ |
| com.apple.developer.carplay-maps | ✅ | ✅ | ✅ | ✅ | ✅ | ✅ | ❌ | ✅ | ✅ | ❌ | ✅ | ✅ |
| com.apple.developer.carplay-parking | ✅ | ✅ | ✅ | ✅ | ✅ | ❌ | ❌ | ❌ | ❌ | ✅ | ✅ | ✅ |
| com.apple.developer.carplay-quick-ordering | ✅ | ✅ | ✅ | ✅ | ✅ | ❌ | ❌ | ❌ | ❌ | ✅ | ✅ | ✅ |
Connect / Disconnect
Efficiently manage CarPlay connections by utilizing the connected status and on-connect/disconnect events. Ensure to check the connection state before invoking CarPlay APIs, ideally within a useEffect hook or by using a non-React function.
// react
useEffect(() => {
  CarPlay.registerOnConnect(onConnect);
  return () => {
    CarPlay.unregisterOnConnect(onConnect);
  };
});

// imperative
CarPlay.registerOnConnect(() => {
  CarPlay.setRootTemplate(/* template */);
});
Templates
Templates are used to render contents on the CarPlay screen from your app. Details of the templates supported by apple can be found in the developer guide (opens in a new tab)
MapTemplate
A template that displays a navigation overlay that your app draws on the map.
Visual Previews
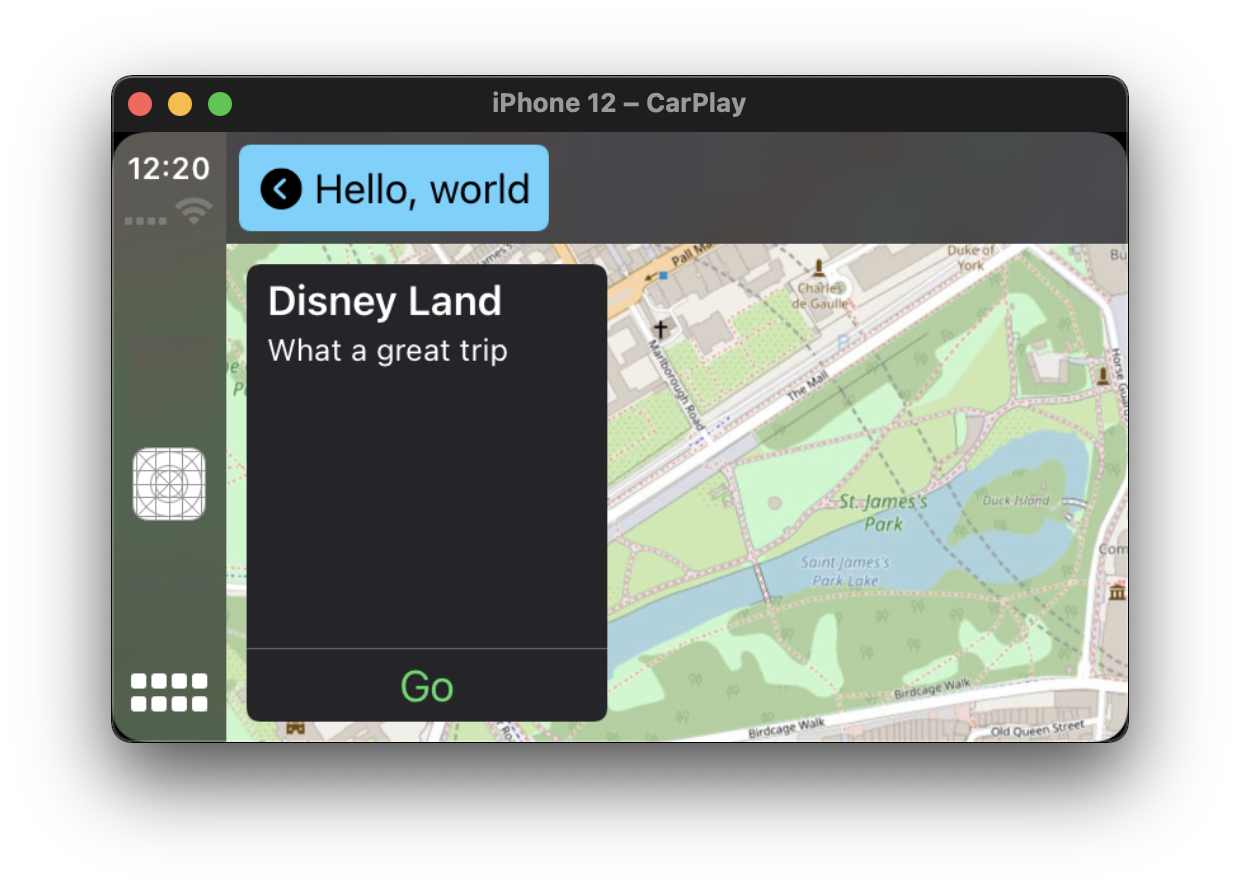
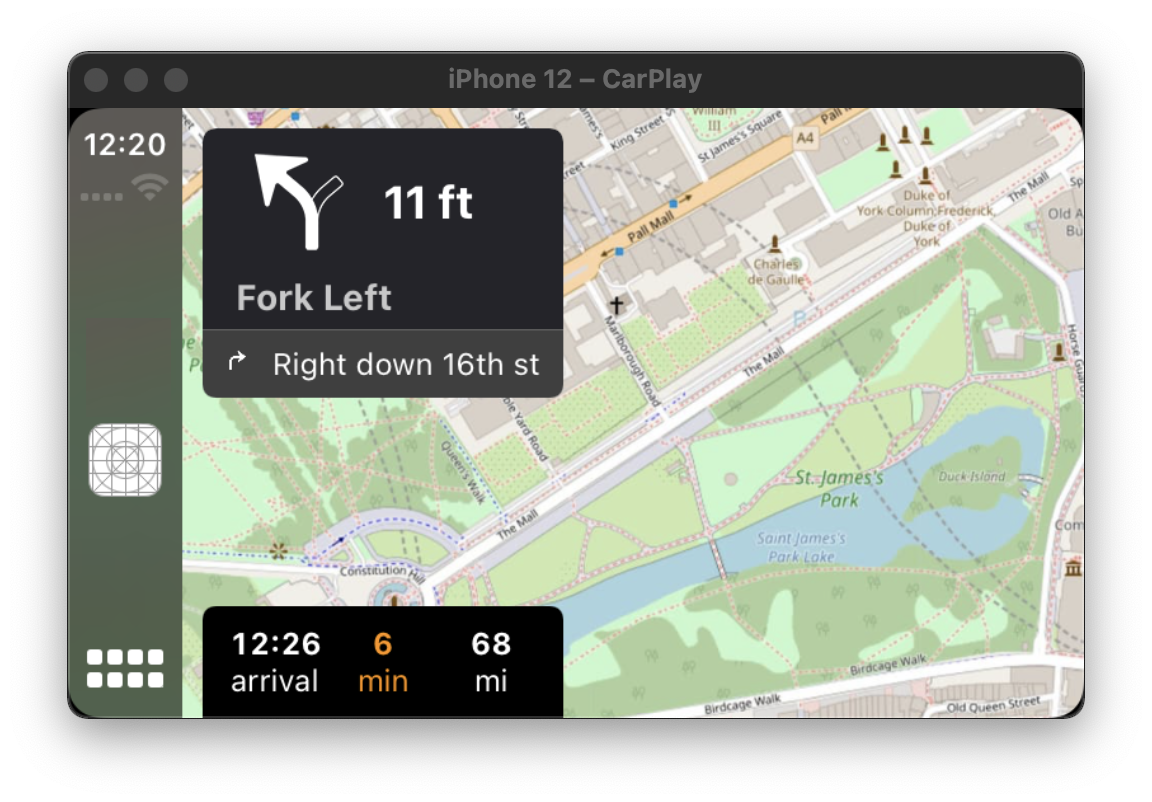
Example Usage
new MapTemplate({
  component: /* react native view */ MapView,
  guidanceBackgroundColor: '#eeff00',
  onAlertActionPressed() {},
  onStartedTrip() {},
});
See more configuration options in the TypeScript Docs
Relevant Links
- CPMapTemplate (opens in a new tab): Learn more about the capabilities and limitations of the MapTemplate in CarPlay.
- CPMapTemplateDelegate (opens in a new tab): Understand the delegate callbacks that can be used to manage user interactions with the MapTemplate.
ListTemplate
A template that displays and manages a list of items.
Visual Previews
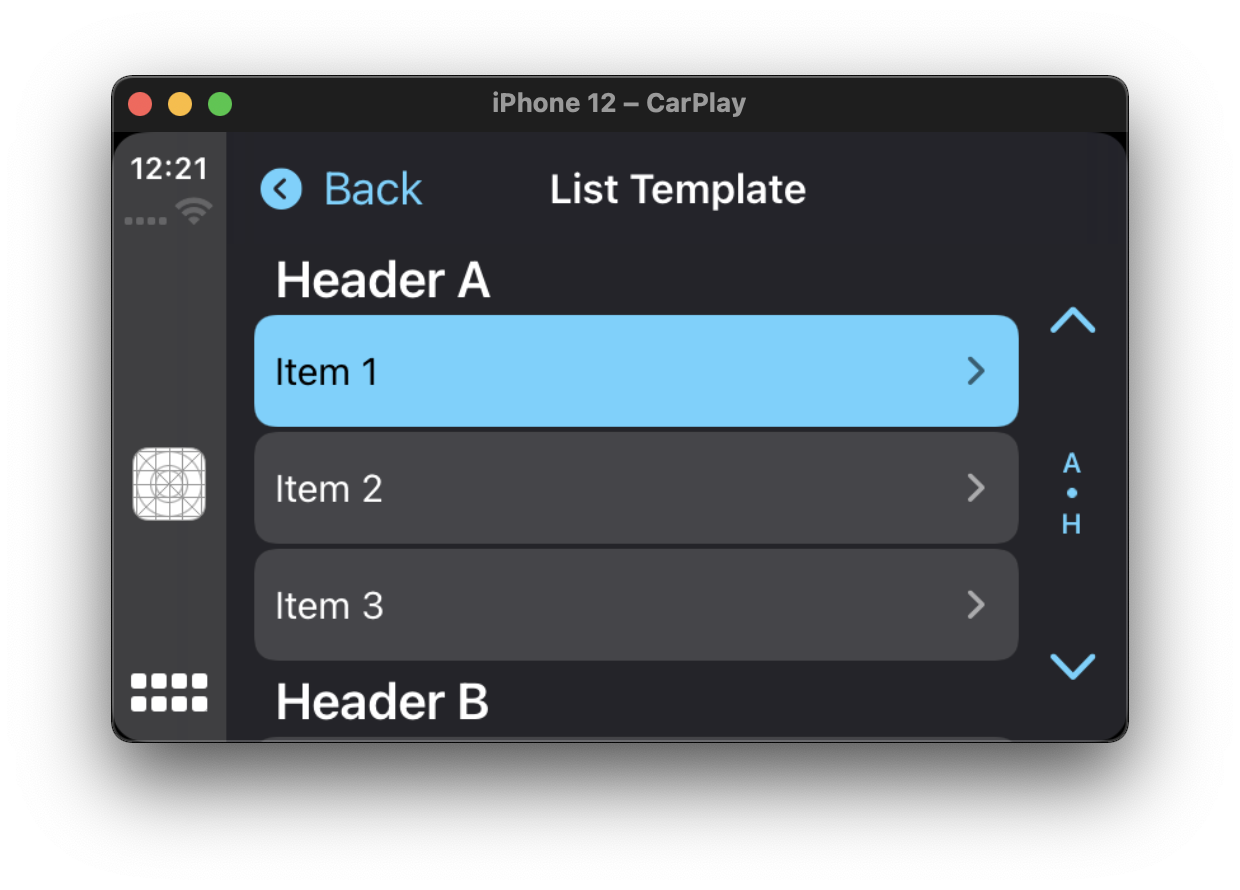
Example Usage
new ListTemplate({
  sections: [
    {
      header: 'Header A',
      items: [
        {
          text: 'Item 1',
        },
      ],
    },
  ],
  title: 'List Template',
  async onItemSelect() {},
});
See more configuration options in the TypeScript Docs
Relevant Links
- CPListTemplate (opens in a new tab): Learn more about the capabilities and limitations of the ListTemplate in CarPlay.
- CPListTemplateDelegate (opens in a new tab): Understand the delegate callbacks that can be used to manage user interactions with the ListTemplate.
InformationTemplate
A template that provides information for a point of interest, food order, parking location, or charging location.
Visual Previews
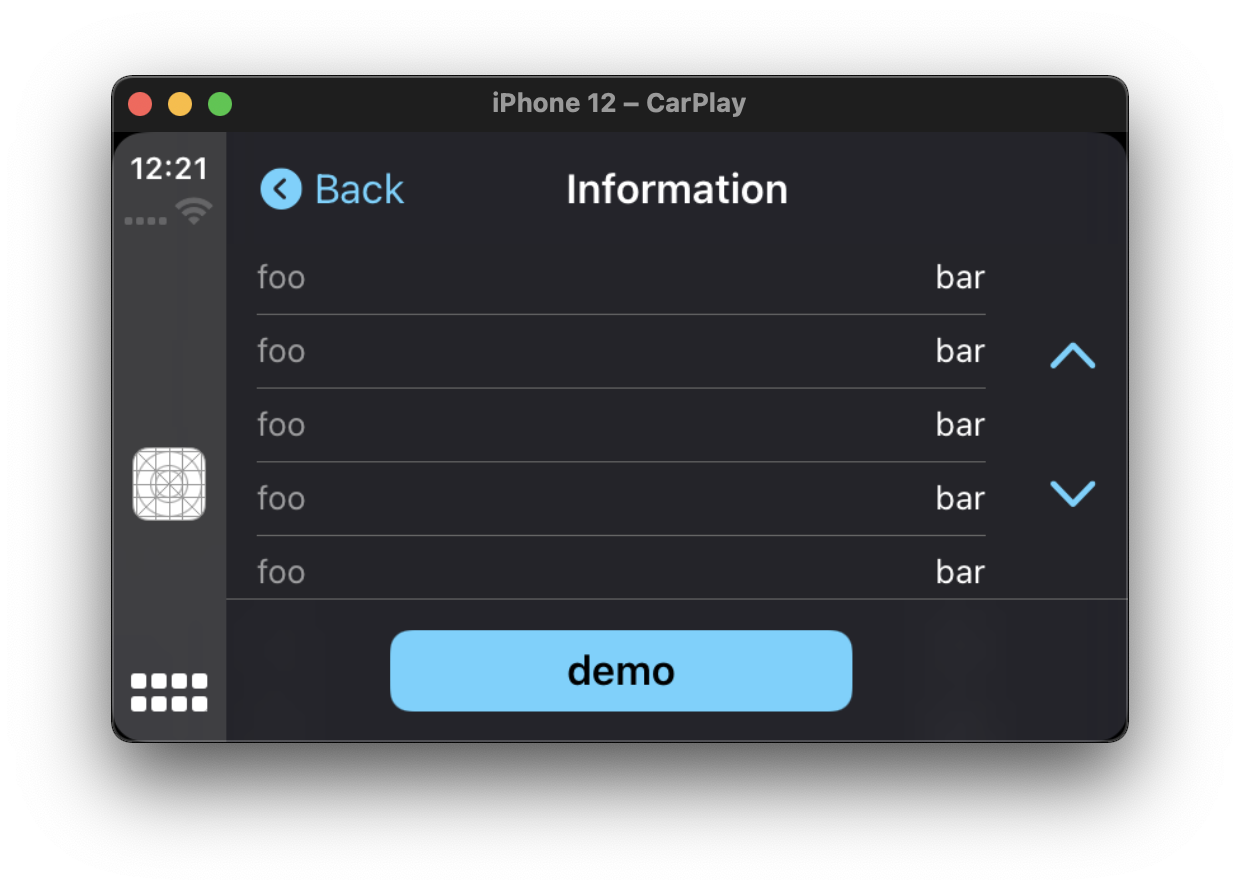
Example Usage
new InformationTemplate({
  title: 'Information',
  items: [{ title: 'foo', detail: 'bar' }],
  actions: [{ id: 'demo', title: 'Demo' }],
  onActionButtonPressed() {},
});
See more configuration options in the TypeScript Docs
Relevant Links
- CPInformationTemplate (opens in a new tab): Learn more about the capabilities and limitations of the InformationTemplate in CarPlay.
- CPInformationTemplateDelegate (opens in a new tab): Understand the delegate callbacks that can be used to manage user interactions with the InformationTemplate.
GridTemplate
A template that displays and manages a grid of items.
Visual Previews
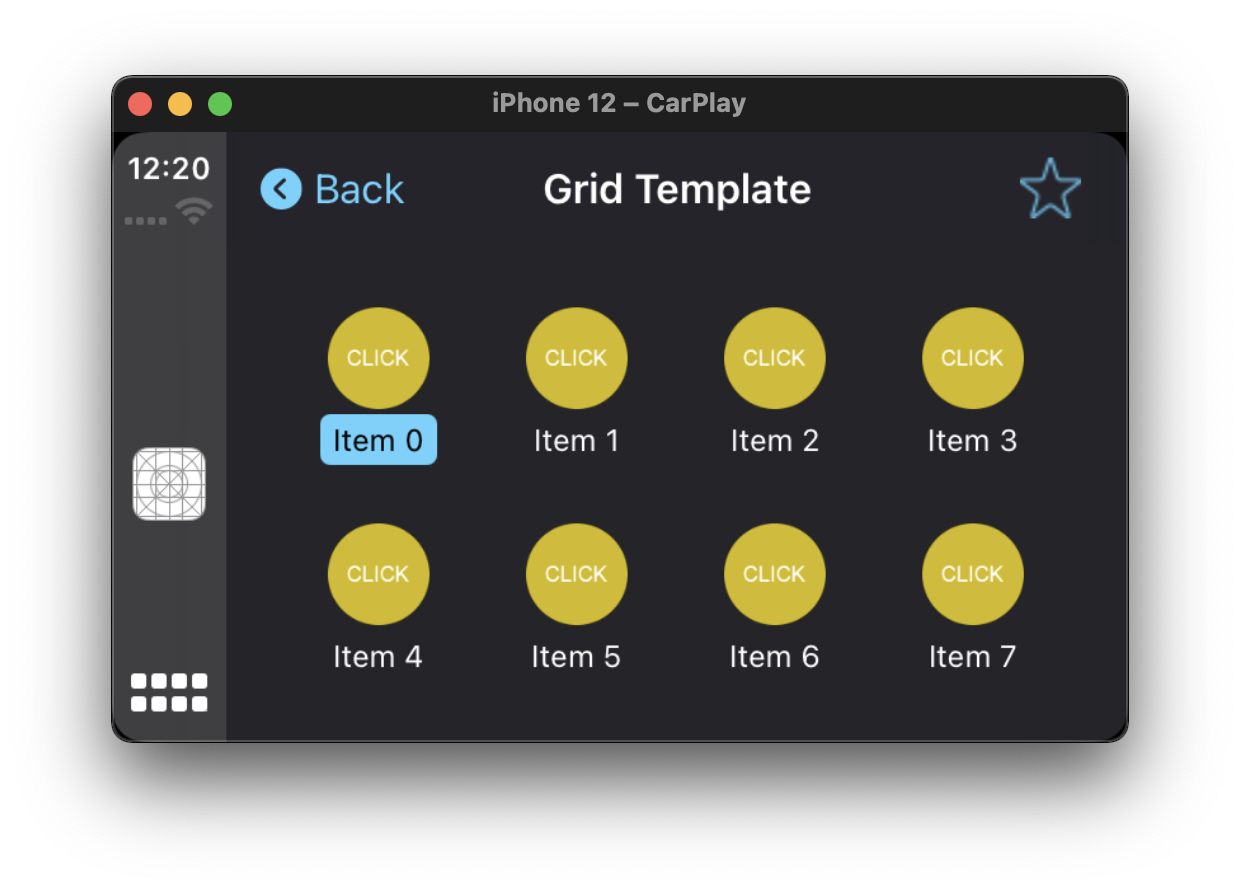
Example Usage
new GridTemplate({
  trailingNavigationBarButtons: [
    {
      id: 'a',
      type: 'image',
      image: require('star.jpg'),
    },
  ],
  buttons: [
    {
      id: '0',
      titleVariants: ['Item 0'],
      image: require('click.jpg'),
    },
  ],
  title: 'Grid Template',
  onButtonPressed() {},
  onBarButtonPressed() {},
});
See more configuration options in the TypeScript Docs
Relevant Links
- CPGridTemplate (opens in a new tab): Discover the capabilities and constraints of the CPGridTemplate in CarPlay.
- CPGridTemplateDelegate (opens in a new tab): Delve into the delegate callbacks available for handling user interactions within the CPGridTemplate.
SearchTemplate
A template that provides the ability to search for a destination and see a list of search results.
Visual Previews
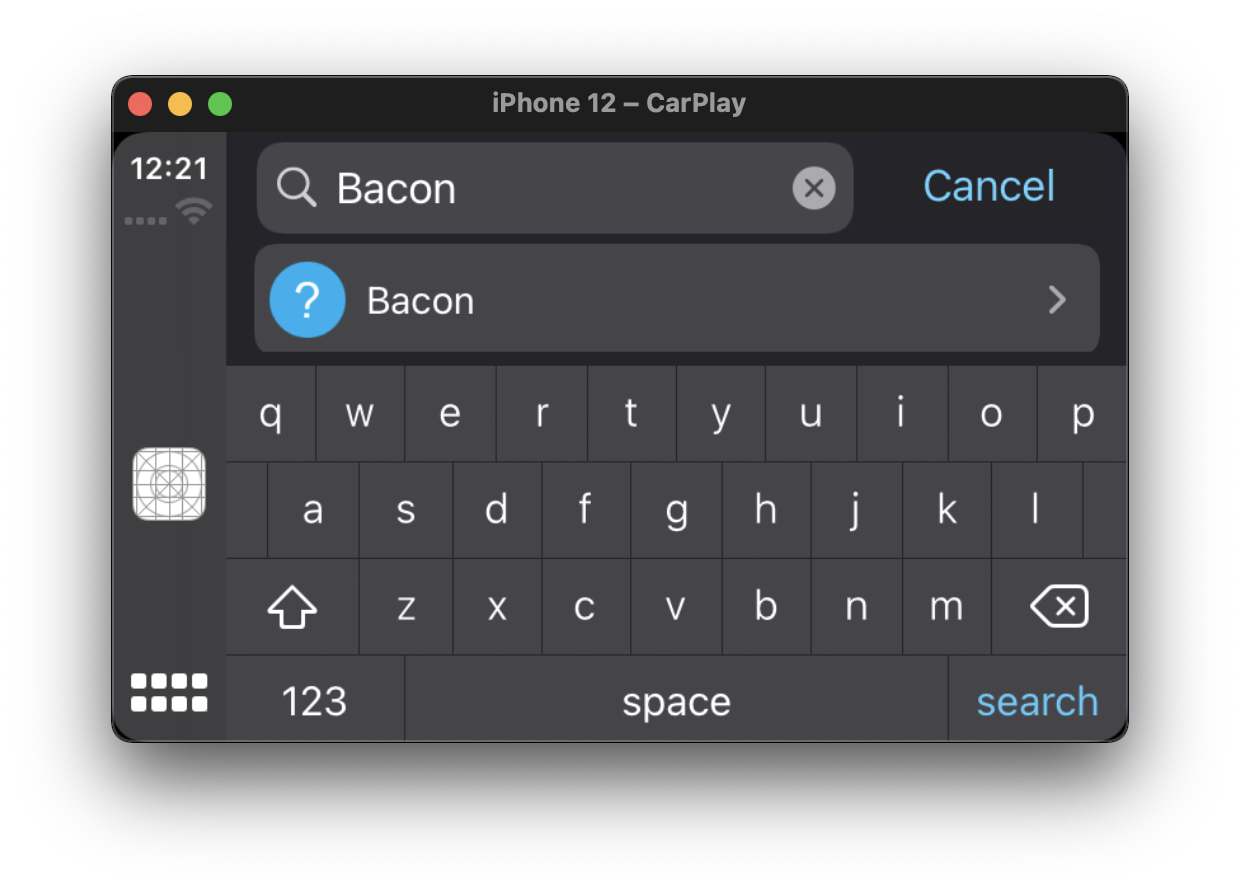
Example Usage
new SearchTemplate({
  async onSearch(query) {},
  async onItemSelect({ index }) {},
  onSearchButtonPressed() {},
});
See more configuration options in the TypeScript Docs
Relevant Links
- CPSearchTemplate (opens in a new tab): Explore the features and limitations of the CPSearchTemplate in CarPlay.
- CPSearchTemplateDelegate (opens in a new tab): Learn about the delegate callbacks for managing interactions within the CPSearchTemplate.
VoiceTemplate
A template that displays a voice control indicator during audio input.
This template is presented via CarPlay.presentTemplate. In order to implement voice recognition, take a look at the @react-native-voice/voice (opens in a new tab) package.
Visual Previews
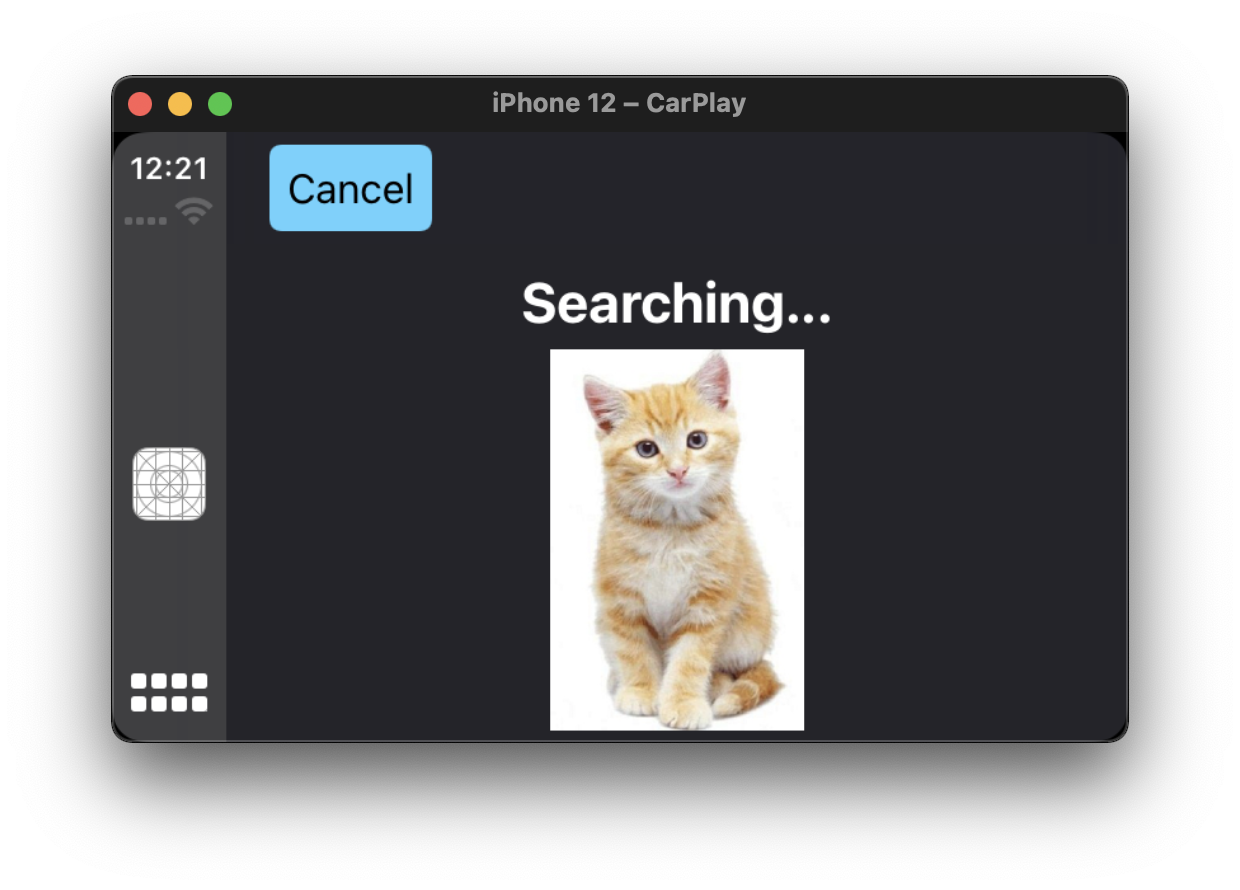
Example Usage
new VoiceControlTemplate({
  voiceControlStates: [
    {
      identifier: 'a',
      image: require('cat.jpg'),
      repeats: true,
      titleVariants: ['Searching...'],
    },
  ],
});
See more configuration options in the TypeScript Docs
Relevant Links
- CPVoiceControlTemplate (opens in a new tab): Investigate the functionalities and boundaries of the CPVoiceControlTemplate in CarPlay.
- CPVoiceControlTemplateDelegate (opens in a new tab): Gain insights into the delegate methods designed to handle user voice commands in the CPVoiceControlTemplate.
- SFSpeechRecognizer (opens in a new tab): Learn about speech recognition tasks and integrations with CarPlay applications.
AlertTemplate
A template that displays a modal alert and should be presented via CarPlay.presentTemplate.
Visual Previews
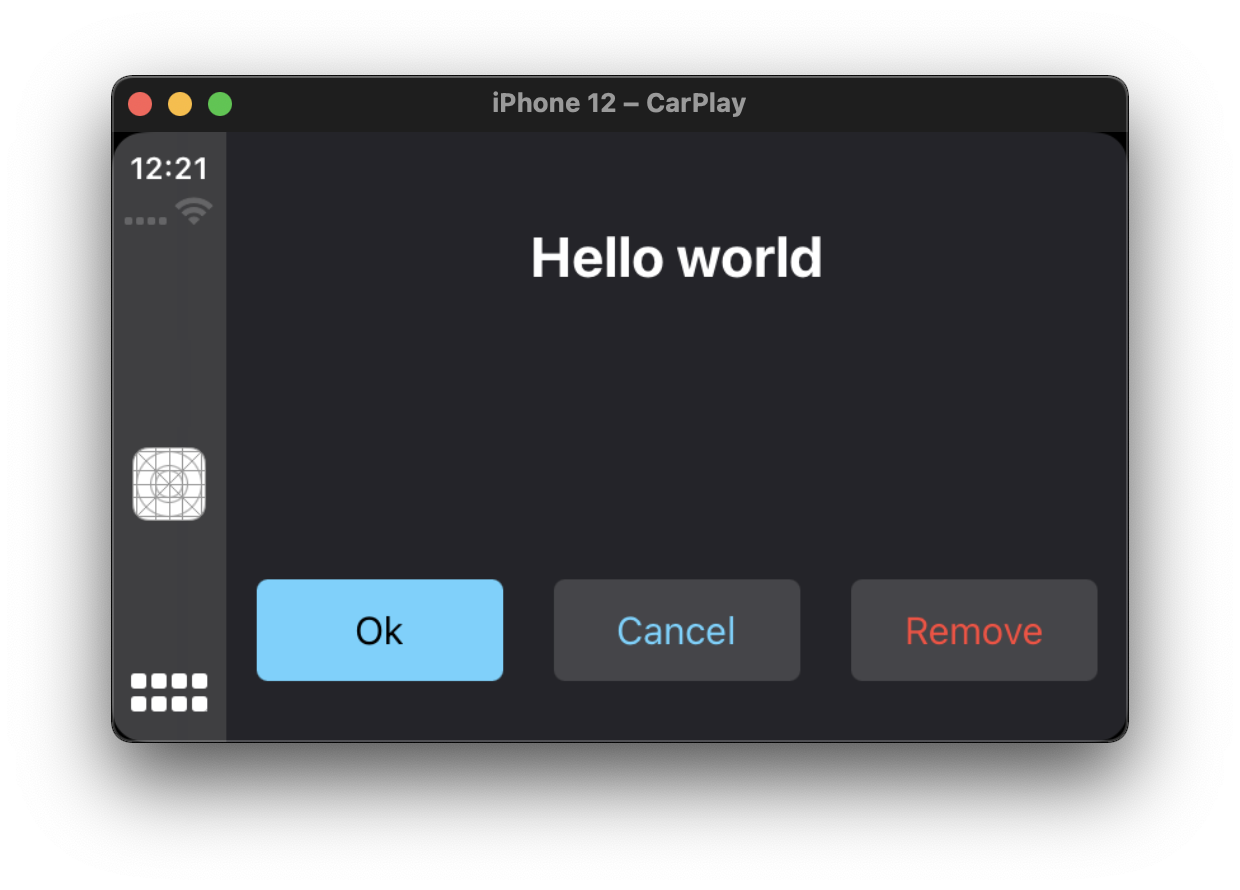
Example Usage
new AlertTemplate({
  titleVariants: ['Hello world'],
  actions: [
    {
      id: 'ok',
      title: 'Ok',
    },
    {
      id: 'ok',
      title: 'Cancel',
    },
    {
      id: 'remove',
      title: 'Remove',
      style: 'destructive',
    },
  ],
  onActionButtonPressed() {},
});
Relevant Links
- CPAlertTemplate (opens in a new tab): Explore the functionality of CPAlertTemplate for displaying alerts in CarPlay.
- CPAlertTemplateDelegate (opens in a new tab): Learn about delegate methods for managing user interactions with CarPlay alerts.
ActionSheetTemplate
A template that displays a modal action sheet and should be presented via CarPlay.presentTemplate.
Visual Previews
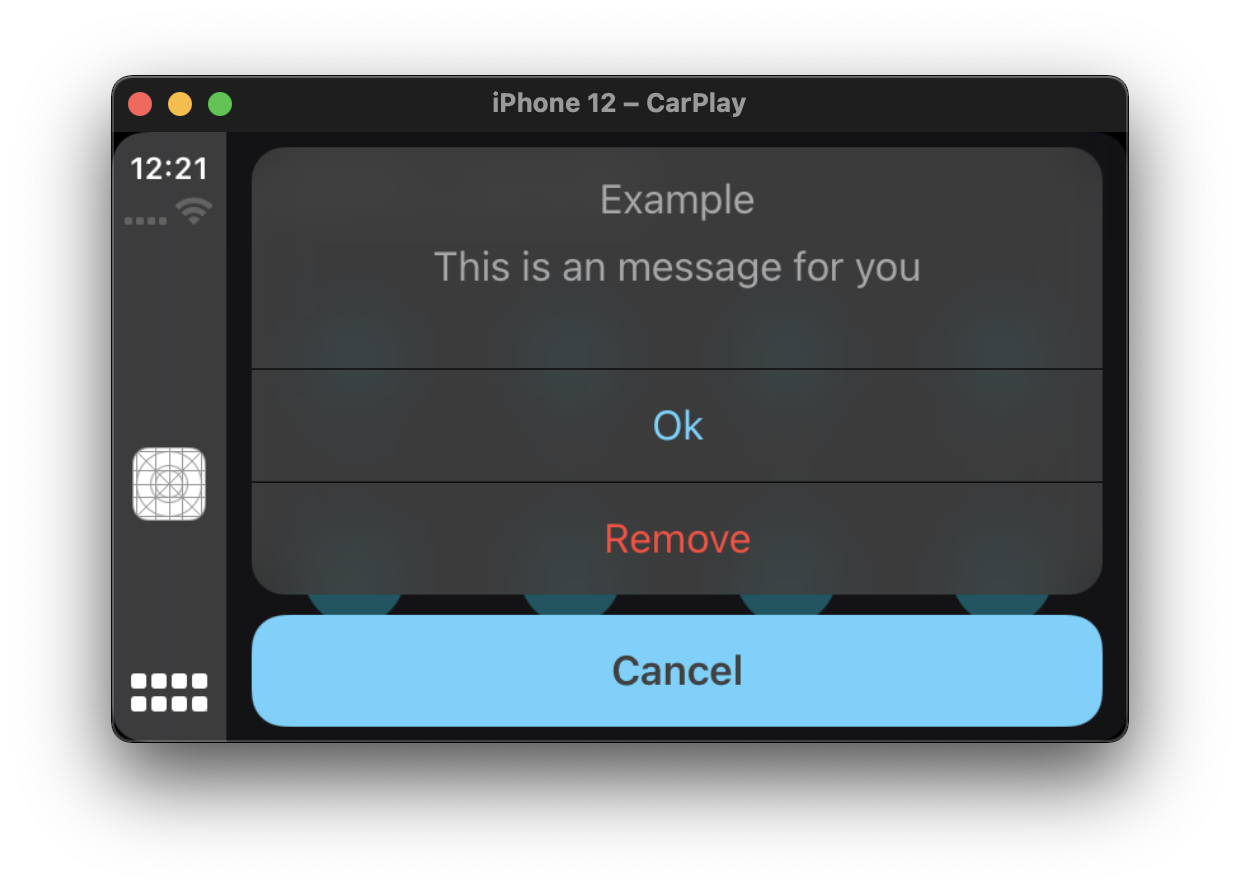
Example Usage
new ActionSheetTemplate({
  title: 'Example',
  message: 'This is an message for you',
  actions: [
    {
      id: 'ok',
      title: 'Ok',
    },
    {
      id: 'remove',
      title: 'Remove',
      style: 'destructive',
    },
  ],
  onActionButtonPressed() {},
});
Relevant Links
- CPActionSheetTemplate (opens in a new tab): Discover how to present an action sheet in CarPlay using the CPActionSheetTemplate.
- CPActionSheetTemplateDelegate (opens in a new tab): Delve into the delegate methods to manage selections and handle user actions within a CPActionSheetTemplate.
TabBarTemplate
A container template that displays and manages other templates, presenting them as tabs.
Note: This template must be set as the root template and cannot be pushed on top of other templates.
Visual Previews
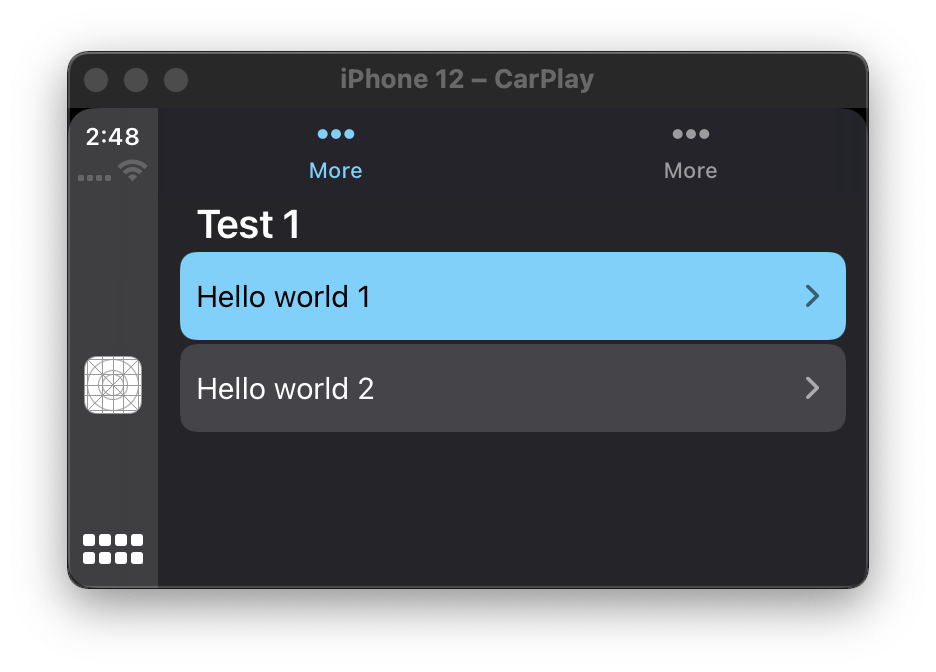
Example Usage
// Define tab templates
const tpl1 = new ListTemplate(/* ... */);
const tpl2 = new ListTemplate(/* ... */);

// Setup the tab container template
new TabBarTemplate({
  templates: [tpl1, tpl2],
  onTemplateSelect() {},
});
Relevant Links
- CPTabBarTemplate (opens in a new tab): Investigate the features and usage of CPTabBarTemplate to create a tab bar interface in CarPlay.
- CPTabBarTemplateDelegate (opens in a new tab): Explore the delegate methods for responding to tab selection events in the CPTabBarTemplate. ``
Troubleshooting
Image Size and Resolution
Quirks observed where PNG image resolutions should be specfied with scale factor of 3.0 (i.e. append with @3x) with ListTemplate image sizing suggested around 80 x 80 px per Issue #6 (opens in a new tab)